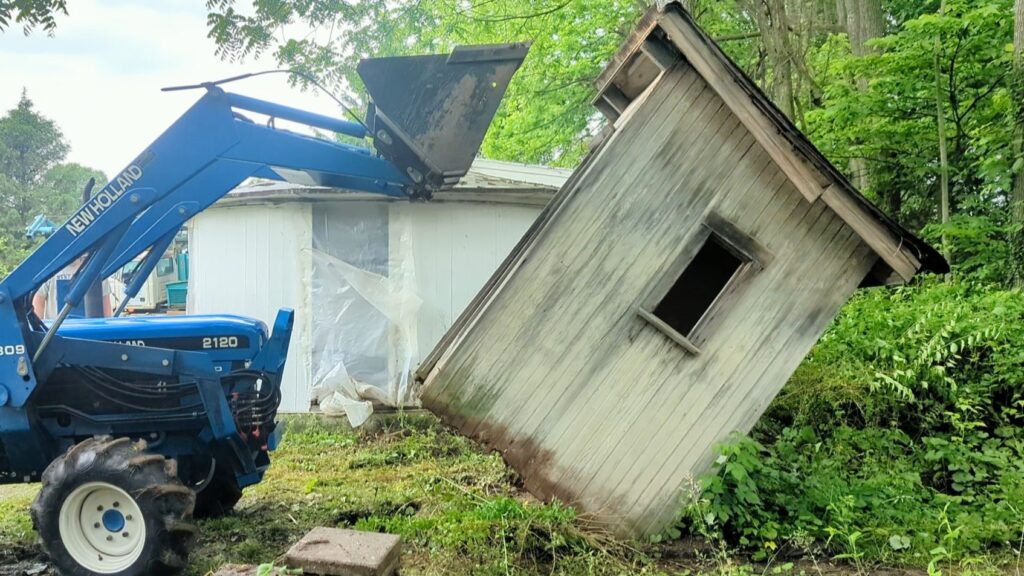
You know you’re working on an old, rural property when outhouse removal is part of your renovation! Although it pains me to get rid of anything old, this outhouse was a bit of an eye-sour and it had significant rot. One push from Steve’s tractor and it toppled. The view of the back part of the 1.9 acre lot is now less obstructed.
Ongoing Refinishing Work
For weeks now, I have been working on power washing, stripping and sanding items that were carefully removed during demo with the hopes of being repurposed in the renovated house. This includes old attic floor boards, old boards from a porch ceiling, and hand-hewn beams removed from the living room ceiling.
Although I have tried to have a good attitude, I am honestly sooo sick of it! With a big push this past week though, I think the end of this dirty, dusty, sweaty work is nearly complete.
I still need to work on the built-in shelves next to the living room fireplace, but that should be the last of this kind of work. Hooray for that!

Fun fact about the built in shelves
Speaking of the built in shelves, take a look at a close-up the next photo.

See those nailed down metal circles in the corners? Well, this is ingenuity! You see, at one time these shelves where enclosed with a door, making this a storage cabinet. The homeowners probably stored canned goods in this cabinet, which is original to the house. Mice would get into the cabinet and need an access hole to move up and down between the shelves. So they chewed holes that were big enough for them to crawl through. These circles are metal can lids that were nailed down by the homeowner in an attempt to block the holes. Isn’t that both disgusting and interesting!!
My parents had an old jelly cupboard in our root cellar when I was growing up. It was made in the mid 1800’s and it had the same chew holes on the shelves. I still have that jelly cupboard. We keep it in our old summer kitchen.
Steve thinks I should leave the metal rings in place when I work on these shelves, but that might be a bit too rustic.
Lots of Finishing Work Happening on The Inside
The interior of the house is nearly all painted. I chose a simple trim detail that I’m really happy with!
Lauren and Parker decided to make the trim a little darker than the walls. I think it’s a good choice and really in keeping with the English farmhouse/cottage feel we all agree would be a nice fit for this house.
You can also see the new floors in this photo. We went with luxury vinyl plank (LVP) flooring throughout the house. It has the look of wood but is significantly less expensive and more durable. It is scratch resistant, waterproof, and easy to clean.
The beams you saw me power washing earlier are now back in there original location in the living room! They are no longer structural, but are now simply decorative. Steve and I went through the same cleaning and restoration process that was used on the log walls. Now they are a perfect match with the log walls and they look like they have always been there (which technically they have been!).

And kitchen cabinets are here!! You know your getting close to completion when the cabinets go in. We chose a shaker style door with full overlay. The upper cabinets will go all the way to the ceiling when the trim pieces and crown moldings are installed. The color is a warm, linen white.
Quartz for the countertops has been selected and will be installed in the next couple of weeks.

Exterior Progress
Progress on the exterior also continues with the installation of the railing on the front balcony.
I know I do this often, but I have included the original 3D rendering I made before construction of The Springhouse even started.
I hope you’re not sick of seeing it because I love looking at it and think about how I felt when I created that image. I remember thinking, “This looks great, but I honestly doubt if the house will ever look this good.” It just amazes me and is a continually reminded of how blessed Steve and I have been throughout this process.


As always, thank you all so much for following the progress!
Until next time!
It looks awesome! You guys embarked on an incredible labor of love and it’s coming together exactly as you envisioned. Great job!
Thanks so much, Paul!
Bahaha.. “..but that might be a bit too rustic.” I can hear you saying this! 🤣
Finally catching up on this and more! AMAAAZING work, and I’m overjoyed for you all that Lauren and fam will be moving in! 🥰