
After 3 years filled with doubts, distractions, and discouragement, work has finally begun on The Springhouse! How gratifying and reassuring it has been to see dumpsters being delivered to the sight as the first sign of progress and the beginning of a new life for this property.
Most Of It Has To Go
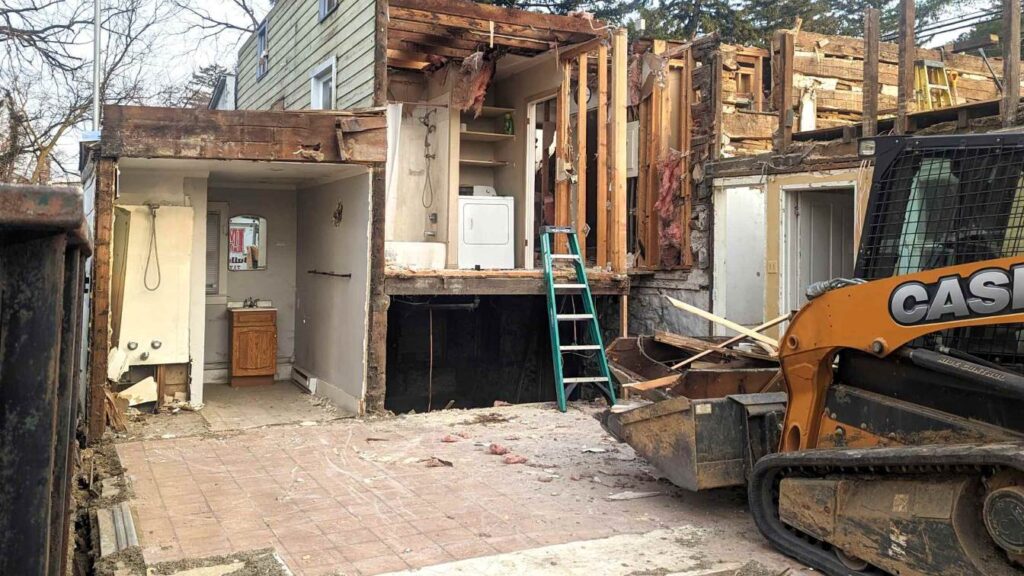
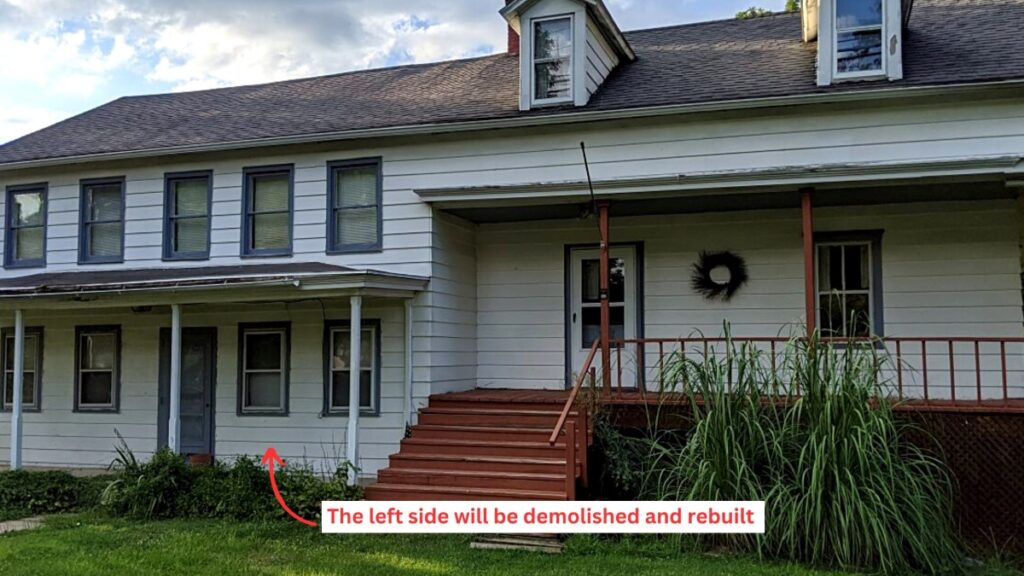
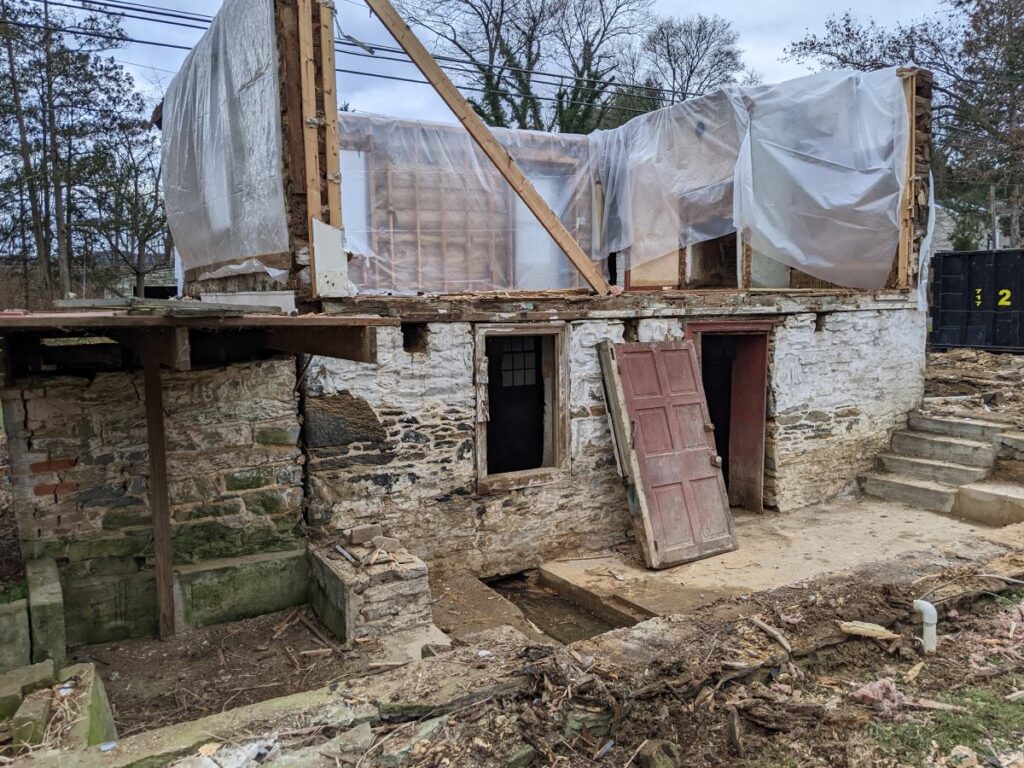
With demolition underway, Steve and I soon got our first glimpse of just how bad the left side of the house really was and realized with certainty that removing this whole side of the house was the right call. The integrity of this part of the house was even worse than we expected. In the late 1800’s when it was constructed, it had been built directly on stones that were just stacked on the ground. No footers whatsoever!
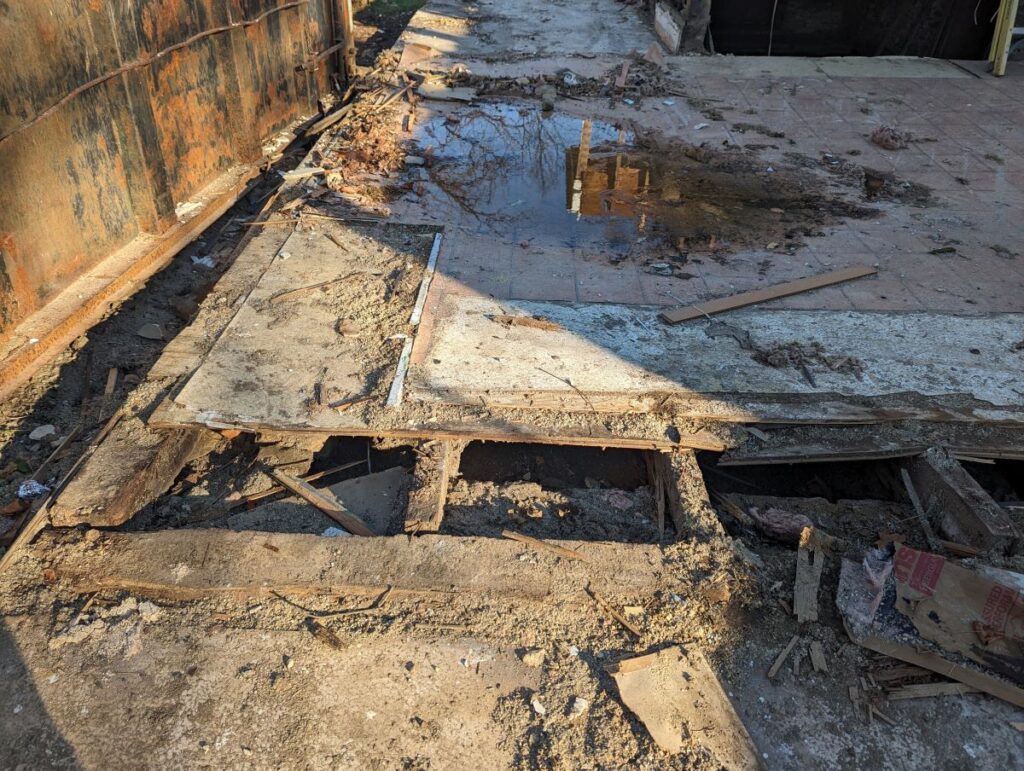
The picture below shows the floor of one of the additions that was built just inches from the ground below. An industrious groundhog burrowed under an exterior wall on this part of the house, making a cozy home for himself under the floor!
What Would Demolition Reveal?
Day after day as more of the structure was removed, we would check on the progress, anxiously awaiting the day when the logs would be visible.
We held our breath, hoping for something worth salvaging. Let’s face it, without the logs, we might as well demo the whole thing and just build from scratch. We considered a complete new build many times in the planning phase. But because of the historic nature of the house, this option just didn’t sit right with us. It was one of the reason we bought the property in the first place. At this point, we had no choice but to move forward, hoping and praying there was something historic worth saving and that was contingent on the condition of the logs.
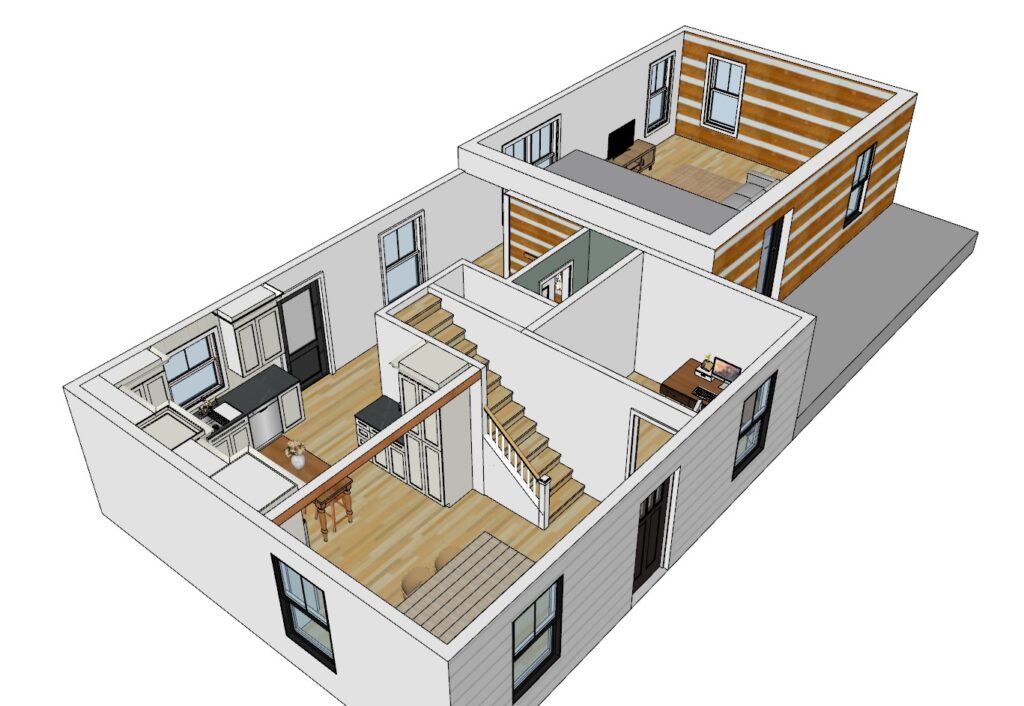
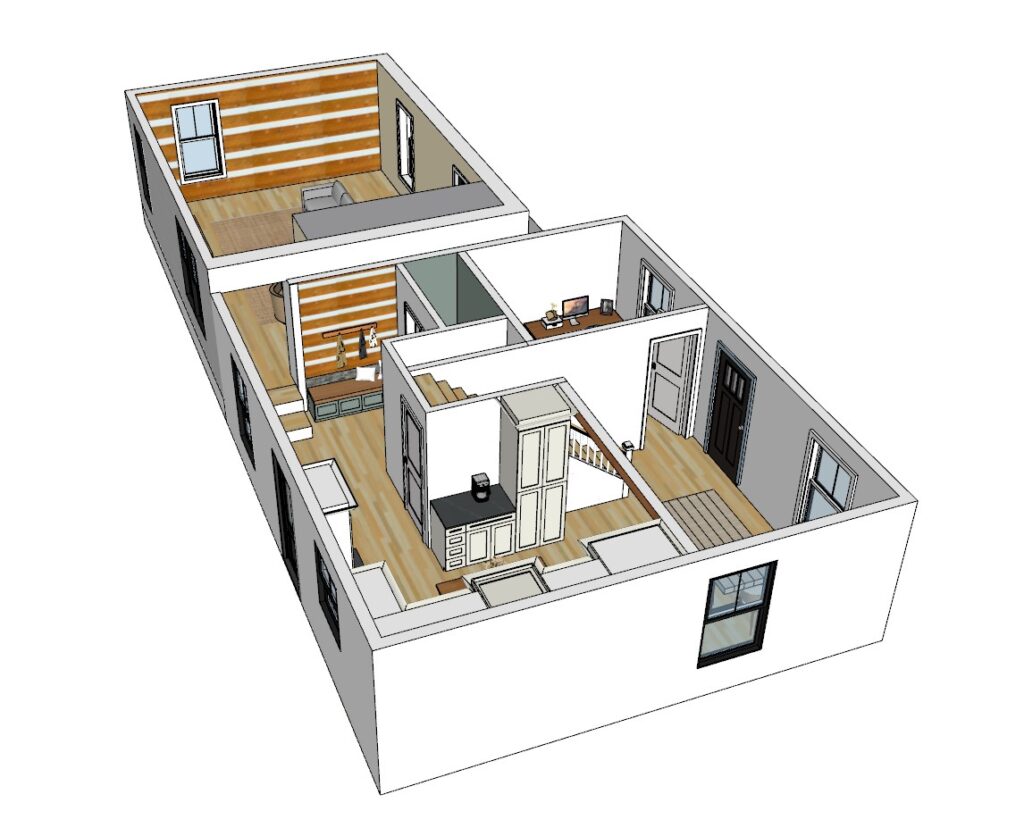
In our plans, only select portions of the log walls would be exposed . After all, studding would need to be built over some parts to account for insulation and wiring.
Below are a couple of 3D Sketchup models I created from the architect’s 2D floorplans. These renderings illustrate our plan to expose the logs on the front exterior, as well as on one living room wall and one mudroom wall on the interior.
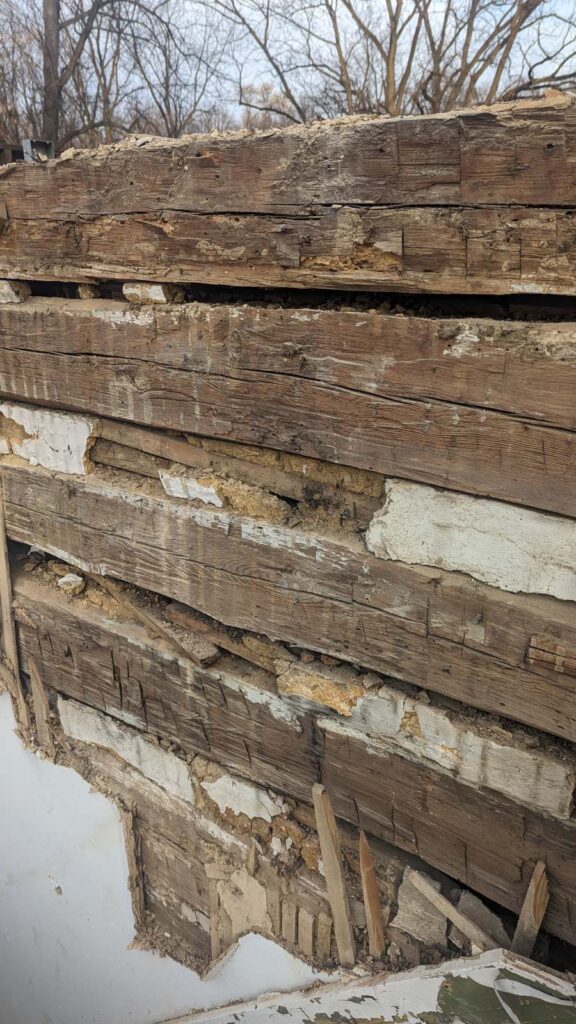
Our First Glimpse of the Logs
Finally the day came when both the exterior siding and the interior plaster were removed enough to give us some insight into what we had to work with. The logs were rough looking with chinking that would require a lot of attention, but all things considered we were encouraged. There was something worth salvaging after all! I slept more soundly that night than I had for awhile.
The Stone Foundation
As demolition continued, we were also able to get a better look at the foundation walls on the 1700’s side. Although they had retained their structural integrity, they were covered in paint and a concrete-like material that we weren’t sure could be removed. In addition, all of the stone would need to be repointed. All in all though, we could tell there was potential for something beautiful!

The Reality Of Waste In Construction
According to an article by Utilities One, 40% of solid waste worldwide comes from construction and demolition. In the US, construction accounts for more than 600 million tons of waste per year.
Fortunately, on this project we were able to take some steps to cut down on the amount of waste going to a landfill. Moving toward sustainability is vital. Even small steps in the right direction matter.
Steps Toward Sustainability – 3 Ways We Reduced Landfill Waste
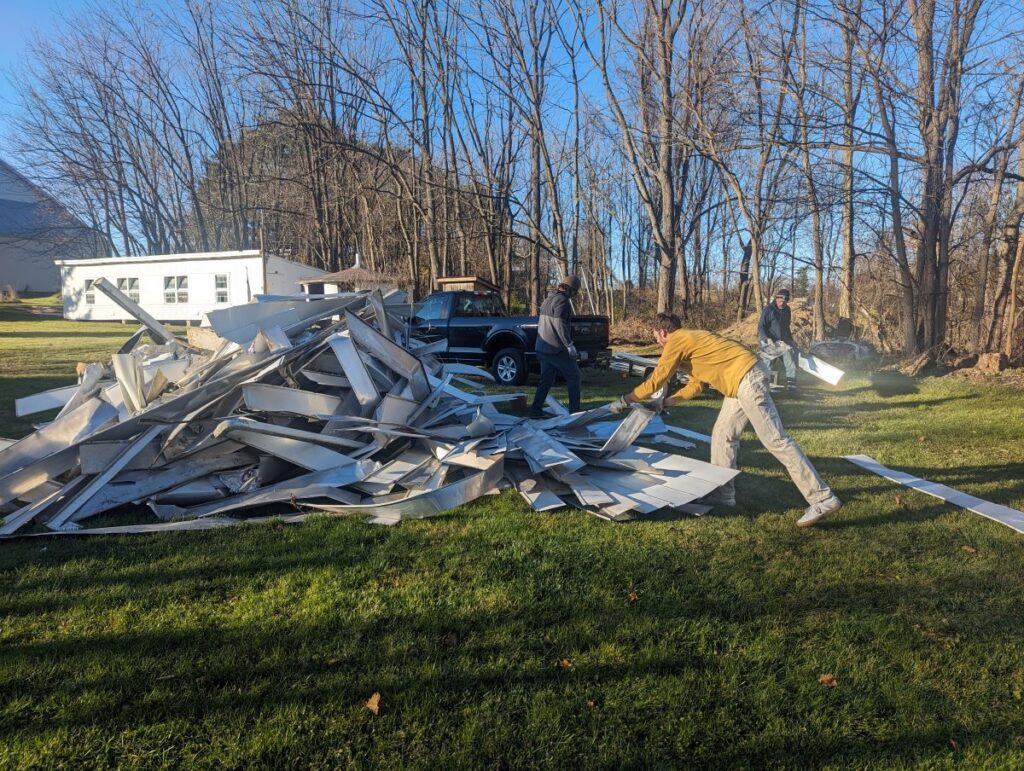
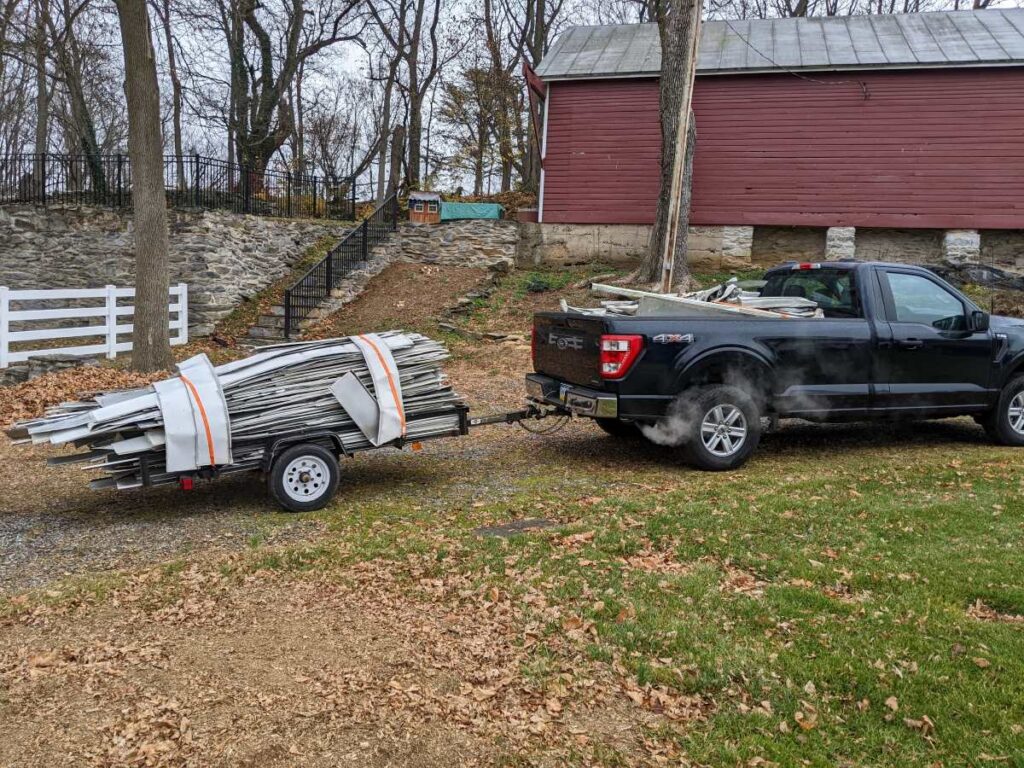
1.We recycled what we could.
The contractor was willing to pull off the aluminum siding and put it on a pile. With the help of our son and son-in-law, we flattened it all out, removed the nails and loaded it on our truck and trailer! I’m not going to lie! This took a lot of work but was worth it knowing we could recycle a valuable and reusable resource. And we made $450 on it!
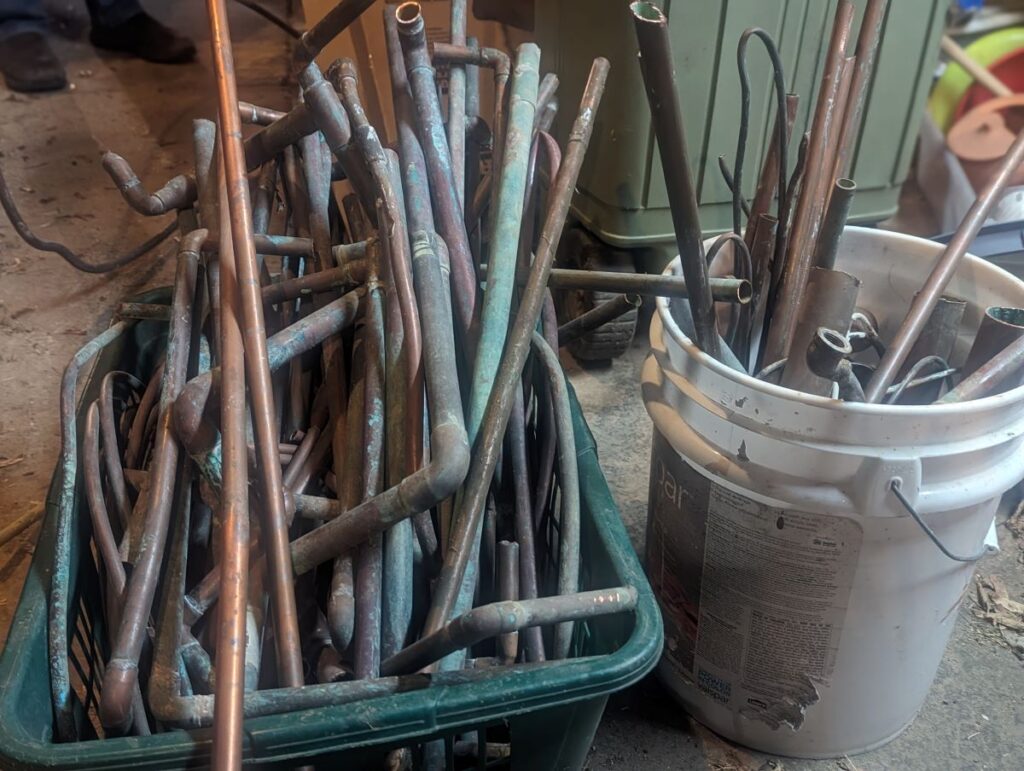
More than 60 pounds of Copper pipes were removed and saved for recycling. Copper pipes are worth almost $3 per pound and much easier to handle than the aluminum siding!
Other miscellaneous items like the hot water heater, cast iron bathtubs, and appliances were taken to a recycling center that handles this kind of mixed materials. One of the men on the construction crew used his dump truck to take care of this. The load was worth about $200.
2. We kept everything that had potential for reuse or resale.
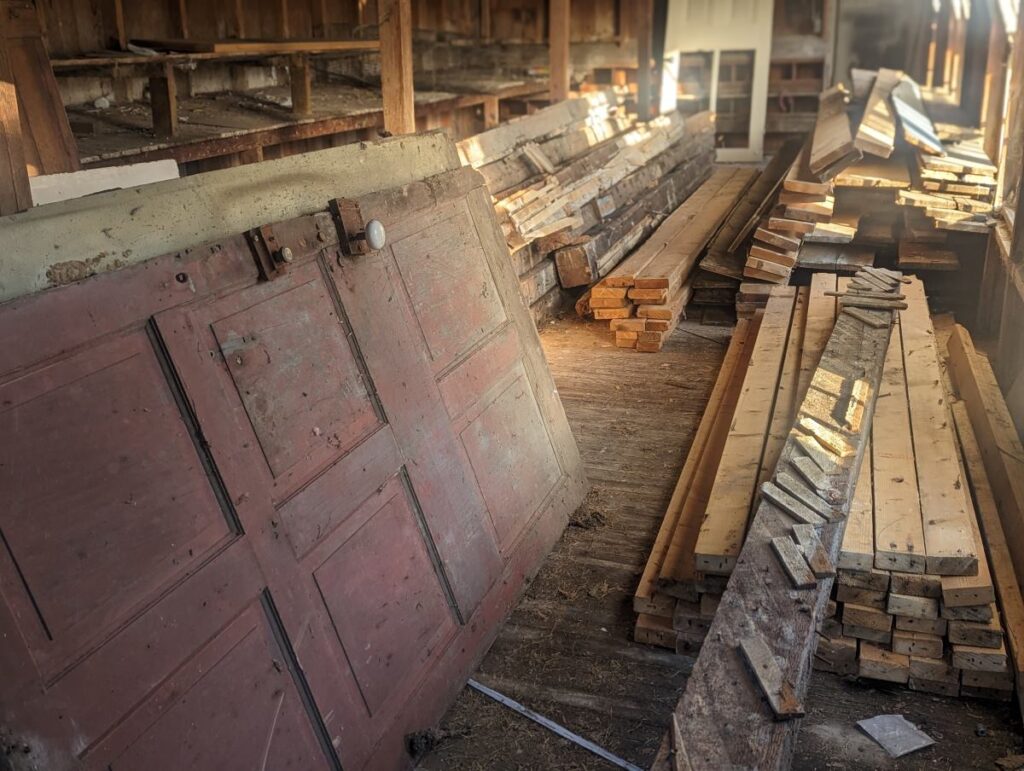
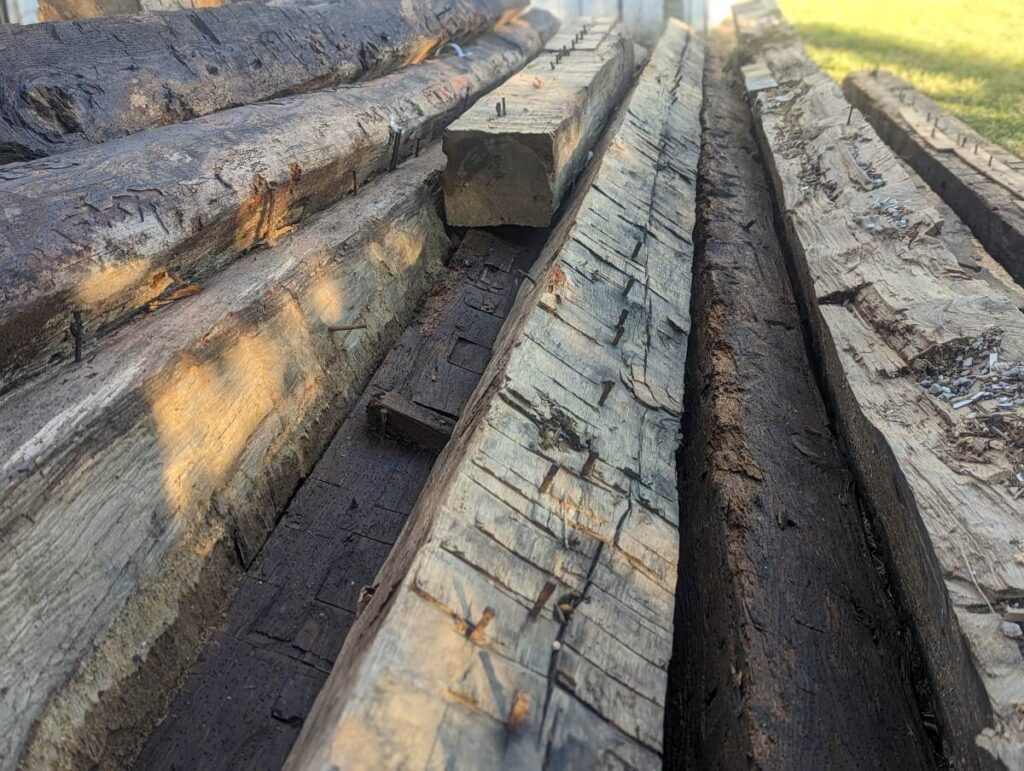
An old chicken house on the property became the storehouse for old doors, salvaged beams, beaded boards from a porch ceiling, and any other boards that could potentially be repurposed in the home to add historical context and charm. We also saved some newer lumber we planned to reuse on our own chicken house project. Saving all of these materials was only possible because of our contractor’s willingness to pull it all aside for us. Steve had the laborious job of pulling all the nails!
3.We used the concrete as clean fill.
Our contractor, Mark, dug a hole in a low-lying area in the back of the property . He buried the broken up concrete and cover it over with excess soil from the demo process.
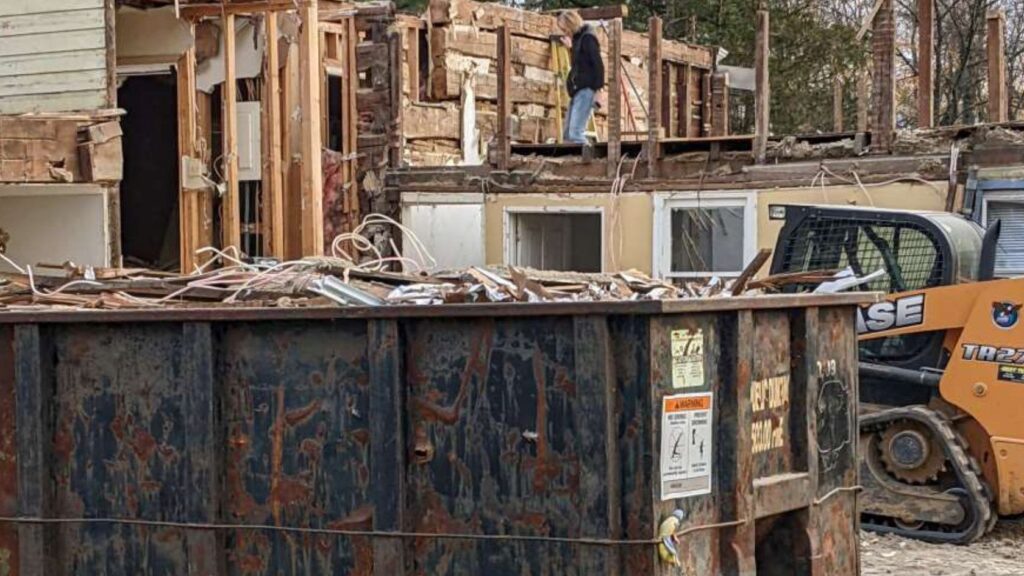
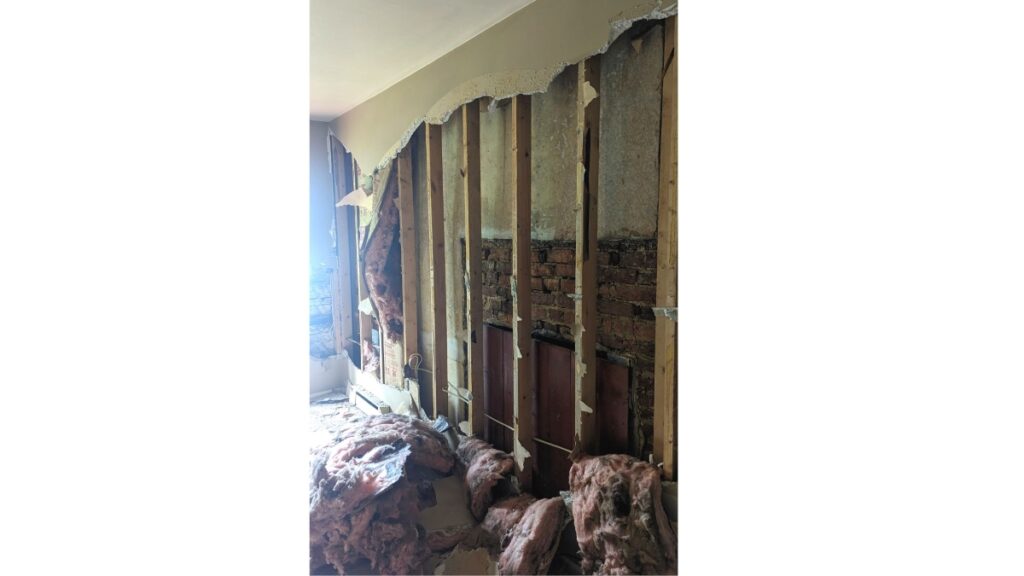
Reflections on the Demolition Process…Historic restoration and renovation are not for the faint of heart!
I think the picture below really captures the extensive nature of The Springhouse Project. Even though things are going smoothly, it is still messy and scary and overwhelming! It has been an exercise in trust: trust that our contractor can make it all right again, trust that our decision-making process is sound, and trust that the outcome will be favorable (including the financial outcome).
I have had to remind myself daily that the uncertainty of the demo phase will not last forever. When rebuilding begins, I know everything will be much more predictable and straightforward. But for now, I am trusting and praying that it will all come out okay. Only time will tell!
What’s Next?
Rebuilding Begins!
In my next post, you will see The Springhouse Project move from the stripping away phase to the first steps of restoration and rebuilding.